My favorite time of year!

Hi all!  Sorry again for the extended hiatus.  Life is finally starting to slow down a bit, which is great, as I am in serious need of some down time.

I just wanted to make a quick post to show some fall decorating that has taken place in my house over the past few weeks, in between all the craziness.  This is the first time I get to decorate my new living room, so I am excited to share!  Most of my living room decor focuses on my Boney Bunch collection.  It’s fun to be able to display it in one central location, since for years it was scattered all around the first floor.  The bookshelves are the perfect place for the majority of these pieces.

I realize the lighting is a bit dark (these were taken with my iPhone early one morning, before work), but I think you get the idea.


I think my favorite spot in the living room is the console table behind our sofa.  Remember the table runner I made last year?  By the way, the candies in the right-hand bowl are Caramel Apple Milky Ways, which are just as good as they sound.  Mmmmm…

When I was at the Magic Kingdom in early September, I came across this little Ghost Mickey Jim Shore figurine that I just couldn’t resist.  He’s the newest member of my Halloween decor collection.  Again, sorry for the dark pic.

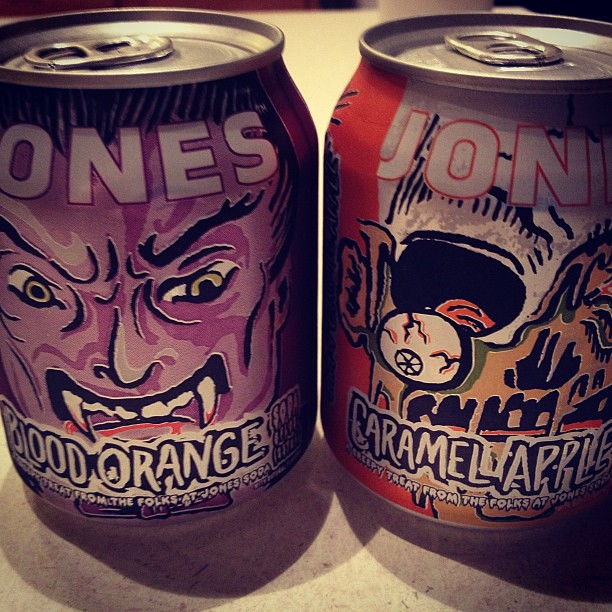
Not really decor, but I could not resist when I saw these at Target…  I’m not really a HUGE soda drinker (at least by comparison to my soda-guzzling husband), so I love that these are tiny cans.  The caramel apple soda is actually delicious.  It kind of tastes like carbonated apple juice with a little something extra.  Tadd picked the blood orange soda…I’m not really a big orange soda fan, but it was okay.  If you like orange soda, you would probably like it.  But I just love the cans.  So cute and festive!

I will be back soon with tales and pictures of where I have been all this time!

Are you getting into the fall/Halloween spirit yet?

Are you tired of hearing about my living room yet?

We are continuing to make more changes to the living room.  It’s STILL not complete, but sometimes I feel like no room in my house will ever be 100% complete.  I just thought I would share some of the updates since my last post

Before I begin, please excuse the junk on the coffee table and the large cardboard boxes behind the sofa in the top photo.  These big furniture deliveries always seem to come with HUGE amounts of cardboard and shipping materials.  We have broken down SO many boxes for recycling over the past few weeks, and obviously we still have a few more to go.  Also, on the coffee table are the components for some shelf lighting we purchased yesterday for the tops of the bookcases.  Apparently we need some kind of adapter for them, so we can’t install them yet, but Tadd was still in the process of sorting them out when I took that picture.

Yes, we added an armchair!  It’s so nice to have some extra seating.  We needed something small-scale that wouldn’t take up too much room, but I also wanted something that either had an ottoman or footstool.  This chair we ended up with is actually a recliner!  So it takes up even less space.  I love that it doesn’t look like a recliner.  We ordered it at Overstock.com.

We finally got the baskets for the bottom shelves of the sofa table!  I love it…SO much storage.  One of the bins holds a small collection of household tools that we want to keep handy just in case (most of Tadd’s tools live in the garage); a hammer, a nail/wall hanger set, some basic screwdrivers, flashlights, etc.  One will hold spare vases.  And the rest is room to grow for now, until I decide on something else I want to store.

Ever since seeing this post by Thrifty Decor Chick, I have been wanting to buy a tillandsia (also known as an air plant).  I finally found one yesterday at Ikea for $6!  These are supposed to be really easy to care for…they don’t even need soil!

In addition to the tillandsia, I have been working on adding more decor (and color!) into the room.  I bought the little ceramic fish planter filled with succulents at Lowes.  The daisy plate and yellow/coral candle holders were from Hobby Lobby.  And the framed bird postcards were from Ikea ($0.99 for the entire pack of 5 postcards and $2.99 each for the pre-matted frames!)

Still in the plans for the near future:

  • Installing cabinet knobs on the bookshelves (we have the knobs, just need to install them).
  • Installing the cabinet lighting we already bought once Tadd gets the adapter he needs.
  • Paint/treatment on the backs of the shelves…still trying to decide exactly what I want to do with that.
  • Spray paint some of the existing accessories to match the new color scheme.
  • Curtains…Already found the panels I want.  Just have to buy them and a curtain rod and install.
  • Lamps…I want one table lamp for the sofa table and one floor lamp for over by the armchair.

And lower priority plans for a little bit further down the road:

  • Looking for a piece of furniture that we can use as a small bar near where the living room transitions into the kitchen.  We actually have a very small bar already (it was  formerly the ONLY storage piece in our living room and held all my candles), but it has been broken for years.  I would like something much larger, but it can’t be too deep because we don’t want the entrance to the living room to feel cramped and narrow.
  • This is technically more in the kitchen then the living room, but while at Ikea yesterday, we saw a small shoe rack/bench combo that would be PERFECT for the area of the kitchen that transitions into the living room.  That tends to be where our shoes pile up, and I thought the bench would be a nice place for me to set my purse down when I walk in the door.

By the way, now that we have been really living in it for a week or so, I can say that I am completely, totally in love with my new living room.  The new layout and furniture are doing exactly what I had hoped they would: provide a feeling of coziness, and an amazing amount of storage.

Living Room Reveal! (kind of…)

Well, my living room is not finished quite to my liking. BUT, I think it looks sufficiently complete to be able to share it with you here. Please keep in mind that this is still a work-in-progress!  But so far, we are loving our new room. It really does feel completely different!  I find it much more cozy, and it gives us a TON more storage options.

Click here to see some “before” pictures.

And without further ado…

Some things to consider while viewing the photo above:

  • The console table behind the sofa will soon have four large straw baskets in each of the bottom cubbyholes.  Just need to make the time to get back to Ikea to purchase them.  I am on the hunt for a set of 4 decorative items to live in the upper cubbyholes.  Thinking decorative bowls, but not sure yet.  I am also on the hunt for a lamp for the top of that table.
  • We have ordered a very sleek, small grey recliner for the now-empty righthand wall.  It should arrive later this week.
  • The bookshelves on either side of the TV will be in for a makeover soon.  My main goal is to get the backs of the shelves painted so the accessories don’t get lost in a dark abyss like they are now.
  • The cabinet doors on the bottom of the bookshelves are probably my #1 favorite thing about this room.  SOOOOOO much hidden storage.  We want to get some decorative knobs from Hobby Lobby to jazz them up a bit.
  • We have art to hang on the walls, but I’m not 100% sure where I want everything to go yet.  So we are living with mostly empty walls until I figure it out.
  • For some reason, the lighting makes the walls photograph brighter than they actually are.  It’s a much softer yellow in person.
  • Many of the accessories on the bookshelves will get a coat of spray paint in some brighter colors.  Again, this is just a rough draft and a definite work-in-progress.
  • The window needs curtains.

A few more detail pics:

I will keep you posted as we continue to work on this room!

Coral, Green, and Yellow

So our living room reveal is delayed a bit.  I hope to be able to have that ready to share by the end of this weekend…Fingers crossed!

In the meantime, I thought I would share that we have come to an agreement on a color scheme for the room.  It’s totally different for me, but I love it.  I knew I wanted a stronger color scheme for the accessories, since many of the main elements in the room (carpet, sofa, shelves, accent tables) are going to be brown or beige.  I’m just not a beige kind of girl (note the bright red sectional sofa from the old living room), so I really wanted bright pops of color to contrast with all of the monochrome blah.  I am actually loving that I can really go in any direction I want with the beige base…and I am definitely ready to have fun with some BRIGHT accessories!

We already have a pale yellow on the walls, so I wanted to work with that color.  So we decided on bright coral, grass/sage green, and butter yellow.  Cheery, happy, citrusy pops of color to wake up all those neutrals.

The below inspiration photos are different interpretations of the general color scheme we are after, but not an exact match.  And don’t forget, all of this shiny happy color will be toned down with TONS of beige and brown.

Source: Design Seeds

Source: Apartment Therapy

Source: Apartment Therapy


Source: A Rosy Note

Source: A Rosy Note

I must admit…I love that brassy gold lamp in the bedroom pic.  Thinking of maybe incorporating just a smidgen of that too.  The best part, is that if I get tired of these colors, it will be easy to change them out by swapping out the accessories!

Stay tuned for the reveal in a few days…

Living Room Makeover…Before

So I am hoping that the weekend proves to be as productive as I intend it to be.  Currently the plan is that we are getting the new living room furniture delivered tomorrow.  As stated previously, we are getting the beige L-shaped Ektorp sectional sofa, 2 brown/black Billy bookcases (haven’t decided yet if I’m getting the cabinet doors for the bottom half of the Billys right away or waiting until a future date), a coffee table, console table, and possibly an end table.

I actually started clearing out the room last night.  I didn’t think we had too much “stuff” in that room aside from the furniture, but looks were quite deceiving.  I packed up all the decor and candles, cleaned out most of the coffee table shelf (where lots of odds and ends seem to accumulate), and made a pile of Tadd’s stuff that he will have to go through eventually.  Tonight we will move the coffee table, old sofa, and the few other small furniture pieces into my sewing room (still haven’t decided exactly where everything will be going permanently, so for now we are just going to cram everything in there).  Then we will deep clean the carpets with our handy dandy steam cleaner.

Unfortunately, I neglected to get a true “before” picture.  I was looking back through my collection of personal photos to see if I could find a good true “before” shot, and found some decent ones from one of our past Christmas parties…just so you can get a sense of what the room has looked like for the past few years.  Just ignore all the people and the extra kitchen chairs brought in temporarily for additional seating.

I admit I will miss the huge pop of red the old red sofa brought into the room.  I think when I initially bought it back in early 2005 several people in my life suspected I might live to regret buying a bright red sofa, but in almost 9 years and in 3 different homes, I never did.  Not even for a moment!

However, I am excited that I will get to go in a whole new direction with this makeover.  With the red sofa, my design philosophy involved toning down the red with lots of neutral accessories.  So with the beige sofa, expect lots of colorful accessories!  I don’t want to commit to a color scheme quite yet.  We are keeping the pale yellow walls, so whatever we choose will have to jive with that, but I find that it’s still fairly neutral and goes with most schemes that I would be drawn to anyways.  I am on the hunt for an inspiration piece (throw pillows, wall art, etc), and plan to pull the colors of the accessories from there.

For example, I LOVE this (unfortunately, discontinued) pillow from Pottery Barn!  If I could find something similar, I would easily be able to pull a color scheme together for the rest of the accessories.

Luckily, there are much less expensive and more readily available pillows with pretty florals and paisleys in almost any store that sells home decor.  So I am quite confident I will find one that I love just as much pretty quickly.  Hopefully we get a chance to shop for this type of stuff on Sunday!  Accessorizing is the best part!

This kind of thing always triggers my anxiety a little bit.  Big purchases, big changes, and big decisions always tend to do that to me.  But I am also very excited.  I feel like we have way underutilized this room since the beginning.  I am looking forward to a new layout that uses the space more effectively, gives us more flexible and attractive storage options, and more ways to show off our design personalities.  I hope the end result turns out the way I see it in my head.  I guess we will find out by Sunday night!

Master Bath Update…and a new project!

For some reason, summer puts me in house project mode.  It happened last summer too, when we updated our kitchen island.  And the summer before that, it was our powder room makeover.

We are still working little by little on the master bath refresh.  I showed you previously some of the items we had purchased.    I also used up some of my birthday giftcards to get a few more random things.  I picked up an oil-rubbed bronze vanity mirror from Bed Bath & Beyond. Similar to this one, but with a square base.

And just last night I went to Hobby Lobby and got some wall decor (a big iron leaf/feather that I have been eyeing for years)…

…a decorative basket that will live on the tub corner (to hold bath products), and this owl statue and lotus tealight holder:

Between BB&B and HL, I spent about $7 total out of pocket.  Love using the “shopper’s trinity” (sales, coupons, and giftcards)!  We also went to Lowes and picked up a hanging shower organizer and an over-the-door hook for our water closet.

I just have a few more items I would like to buy and/or install before I show you the final product.  I don’t have any before pics, because it was a disorganized wreck, and honestly the “after” pics probably won’t be all that exciting, since I didn’t do anything drastic like paint or replace fixtures (although we ARE seriously thinking about replacing the vanity lighting).  But we are both really enjoying the new set up so far.  It’s nice having a well-appointed, functional, refreshed space that is just for us.  And it was also nice having a low-key project that hasn’t taken much money to feel a big difference.

And our latest project is…a new living room!  Well, same living room, new furniture.  The plan (so far) is to replace our 8.5 year old red American Signature sectional sofa with a beige 2×2 Ektorp sectional from Ikea.  I love our red sofa, but it’s looking pretty worn and it’s just not easy to really clean red microfiber.  One of the things I love about the Ektorp is that it’s almost totally machine washable!  Great for pets and clumsy husbands!  And if you need to, you can just totally replace the slipcover and have what feels and looks like a whole new sofa for a couple hundred bucks.  Some of you may be skeptical about Ikea furniture, but I have done my research and it seems to be almost universally loved by many, many, many home bloggers out there.  I also love the look.  Reminds me of Pottery Barn’s classic slipcover sofas, with a MUCH more reasonable price tag!

Here is a pretty terrible picture of how our living room is configured now:

Unfortunately, it’s the only current pic that I have on hand.  This room is fairly large and opens to the kitchen.  I think my biggest problem with it is that the (obnoxiously huge) TV being at an angle like that takes up way too much space.  And we also have a lot of wasted space between this seating area and the kitchen.  My plan is to move the TV so that it is centered on the wall with all the floating shelves and flank it on either side with tall bookshelves.  I would like the kind that have cabinet doors on the bottom and open shelves on the top, like this:

The floating shelves we have on the wall now will obviously have to be moved elsewhere, but I am sure we can find some great spots for them.  The new sectional will be oriented with one end of the “L-shape” under the window that is just to the left of the TV in the pic above.  The other end will be with the back facing the kitchen.  I plan to put a decorative console table behind that end of the sofa, and if there is room, maybe an armchair against that right-side wall that the sofa is backed up to now.  I hope this will allow the room to feel bigger and will allow us to use more of the space effectively.  There will also be some additional new accent tables, perhaps some curtains, and definitely some new throw pillows for the new sofa.  If we get the bookshelves above with the cabinet doors, I would want to get some pretty decorative knobs for them as well (Hobby Lobby has a ton of really fun ones!).

So stay tuned!  Lots of house updates to come this summer!

Master Bathroom Refresh!

First, quick shout out to my incredible parents.  Today is their 35th wedding anniversary!

Anyways, I have been watching a lot of organization videos on YouTube lately, and was rather suddenly struck with the strong desire to implement a slight overhaul to my master bathroom.  Nothing really intense.  It just really needed a good deep clean, reorganization, and some new accessories.  Although, budget and time constraints aside, I would LOVE to rip the whole bathroom apart and start from scratch.  Everything in that room is boring builder basic…white walls, white cultured marble counter/sink, honey oak vanity, boring light fixture, etc.  But I just really do not have time for a huge project right now, so the focus will be on organization and refreshing the look with a few accessories.

I went to Target last night and picked up some items for the project.  For some reason I was drawn to deep greens and browns.  Would like to eventually incorporate some teals as well, to lighten the scheme.  But the rest of the bathroom is so light (walls, counters, cabinets), that I think the deeper colors help give it some pizzazz.

We got two of these…One for cotton swabs, and one for my round cotton makeup remover pads.

Target

We thought about getting a fancier waste basket, but in the end we went for something more durable and practical and easy to clean, so we got this frosted plastic model.  I thought the oil rubbed bronze base was a nice touch.

Target

We also got an oil rubbed bronze tissue box cover.  I can’t seem to find a picture of it on Target’s website.  It’s pretty basic, but coordinates with everything else.  It’s somewhat similar to the one in this photo, from Bed Bath & Beyond:

Bed Bath & Beyond

I wanted to get some new towels to go with our new look, so we got a few new sets of Threshold towels in the “Moss Lane” color.  Love them!  The color is much more beautiful in person.

Target

I had intended to get a couple of bath rugs as well, but nothing really struck my fancy.  I don’t want a solid, but I also don’t want a pattern that is too busy.  It has to be just right, so I decided to wait and look around.  We need one for the water closet (where our walk-in shower and toilet are) and one for the vanity/tub area.  I would also like to get a few things for the walls, and maybe even a new light fixture or two.

We completely overhauled the linen closet and bathroom drawers.  I used a lot of the plastic bins and baskets that I already had on hand.  But we also bought a few larger fabric storage bins.  So now I have bins for lotions, tooth/oral care, misc skincare, first aid, perfumes/body sprays, etc.  The largest bin has all of our shower stuff (extra shampoos, conditioners, hair products, shower gels, and shaving stuff).  We also tried to get a drawer organizer for our one bathroom drawer, but that drawer is such a weird size, it didn’t fit.  The drawer is huge, but almost ridiculously shallow, so only things that are small or really flat can fit.

We still have a ways to go but it’s so nice to have started!  I will keep you posted with our progress on this mini-makeover.

Pretzel turtles and a bow wristlet!

Wanted to share two quick last-minute Christmas projects with you before I return to my pre-holiday to-do list!

This idea can be found in about five zillion versions on five zillion blogs and Pinterest pins.  I used this version from thehungryhousewife.com.  All you need are mini preztels (the waffle shapes or the traditional twists), Rolo candies, and halved pecans.

Toast the pecans for 7 minutes in a 350F oven.  In the meantime, lay out your pretzels on a foil-lined baking sheet and top them with the Rolos.  Stick the Rolo-topped pretzels in the oven for 5 or so minutes, then smoosh a pecan half on top of each melty Rolo.  Viola!

I was worried that they would stick to the foil, but I put them in the fridge to firm up overnight, and this morning, they popped right off of the baking sheet.

Can’t get much more effortless than that.  I have seen other versions using Hershey Kisses (the white chocolate candy cane ones work great) topped with red and green M&Ms.

Second project is a sewing project.  I wanted to make something special for a relative that will be in town for Christmas, so I decided to make her a wristlet.  But I wanted to do something different from the wristlets I have done in the past.  I found this tutorial from elmstreetlife.com, and decided to make it my own by using natural linen for the body, and one of my favorite quilting cotton fat quarters (beefed up with some medium-weight interfacing) to give a two-toned look.  I really love the size of this wristlet.  I might have to make one for myself.  I hope she likes her gift.

And with that, I am signing off until later this week.  Off to make my cheesecake and finish cleaning the house!

Scrappy Patchwork Tree Ornaments!

I was recently inspired by this post on noodle-head.com and decided to try my hand at making some scrappy tree ornaments like the ones she made.  I found I could make them quickly with very little materials.  I already had a large amount of brown felt leftover from another project, so I cut them into the appropriate shapes (get the printable template on noodle-head.com).

Then all I needed was a few cute pieces of festive holiday fabric.  You barely need any…just some small scraps will do…  (small print works best)

And a little bit of ribbon….

And you’re ready to sew!

It’s pretty simple.  Sew the tree scraps to one piece of felt first.  Then sew the two pieces of felt together with a ribbon at the top for hanging.  One nifty trick is that you stuff a little bit of batting into the ornament while it’s still on the needle, just before continuing on to sew the third and final side of the felt together.

Viola!  Cute, rustic ornaments that take about 5 minutes to make.  I made mine in a very speedy fashion and they are far from the perfect little trees posted on noodle-head.com, but I kind of like that they look handmade and rustic.

A couple of other ideas I had regarding this project:

I made one without the ribbon loop at the top and gave it to my kitties as a toy.  I would like to make another one for them, but put a little catnip in with the batting.

These would be great with some kind of scented item on the inside.  Maybe some cinnamon?

Linking up!:

shabby creek cottage

Christmas Non-Mantel 2012

As I have mentioned several times before, my house, lovely as it is, lacks a fireplace.  As a matter of fact, there are very few newer construction homes in the Orlando area that do have a fireplace.  I envy the houses who do have one to decorate for the seasons.   I make do with my entry table as my makeshift mantel.

https://i0.wp.com/farm9.staticflickr.com/8067/8242516711_9fa61044cd_z.jpg

This year I kept it pretty simple.  My snowflake finials, a cute snowman plush figure, and a mini Christmas tree placed on a silver tray.

https://i0.wp.com/farm9.staticflickr.com/8067/8243578320_9eb63947a4_z.jpg

https://i0.wp.com/farm9.staticflickr.com/8486/8243578532_2fff2cbae8_z.jpg

I used a bunch of Target Dollar Spot ornaments for filler on the tray, which I think gives it that holiday sparkle.

https://i0.wp.com/farm9.staticflickr.com/8061/8243584062_c33d7c305d_z.jpg

I love these snowflake finials!  Got them on sale at Hobby Lobby last year.

https://i0.wp.com/farm9.staticflickr.com/8343/8242515665_fdc613635f_z.jpg

Nothing fancy.  Just cute, simple, sparkly, and festive.

Linking up!:

https://i0.wp.com/1c6162ac207f6525cfd8-84665c880233094a565668f32cb79f8e.r10.cf2.rackcdn.com/2012/11/holiday-home-link-parties.jpg

The Lettered Cottage